
Availability: All Levels
This feature is available on all plan levels.
Event Rental Systems provides some default configurations for adding employees to your ERS folder. To add, edit, or remove employees from accessing the Control Panel, navigate to Admin>General Config>Users. Below are the default employee groups available for organization. Additionally, the access of these groups can be customized and/or new custom groups can be created.
PRO TIP: the most important things to remember when adding and editing Users are to give each User a unique Username and Password, and to assign each User to the appropriate Group. Any User profile that isn't assigned to a Group will not be able to log in to either the Control Panel or the Driver App.
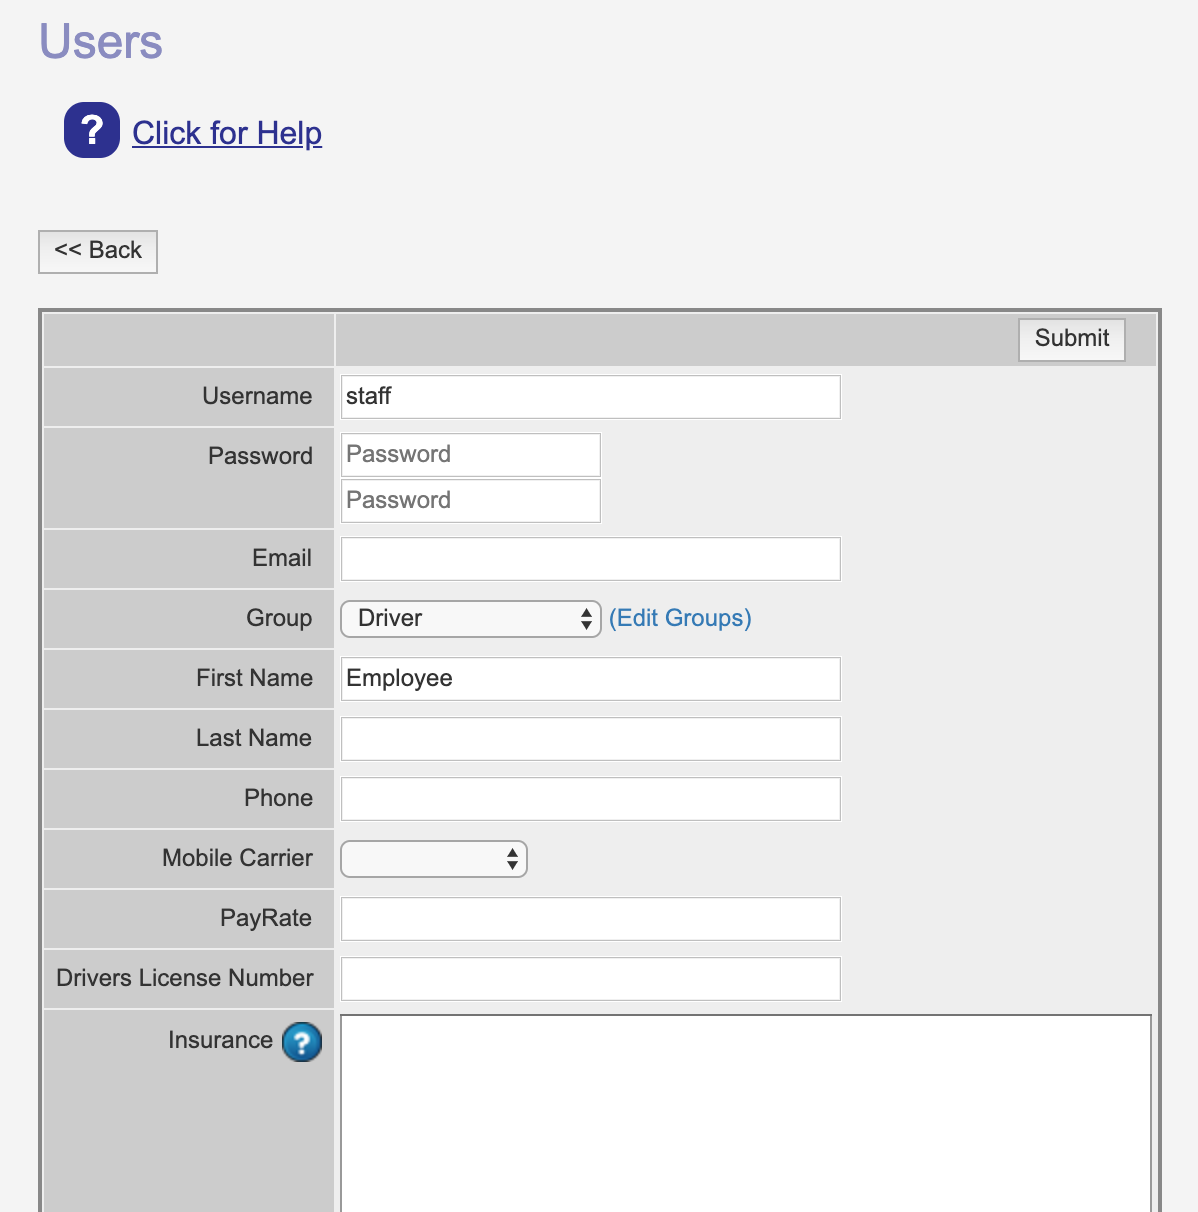
Usernames are unique to every folder. There are no default password requirements except passwords must be a minimum of 3 characters, but ERS suggests using strong passwords with uppercase letters, lowercase letters, numbers, and/or symbols for security. All other user information is optional for added functionality.
There are four default groups created by Event Rental Systems to help you control access to your folder:
- Administrator (Level 10) - Full system access.
- Manager (Level 8) - Managers have full access to Admin with the exception of editing Administrators, editing rules, or adjustments including the tax rate. Managers do not have access to product sharing. They have full report access to see all financial information.
- Employee (Level 4) - Able to create orders, see customer information, and schedule deliveries. Unable to edit system settings or see reporting. Employees, when ordering through the Control Panel, cannot use the general discount fields or apply pricing changes.
- Driver (Level 1) - All areas restricted except for access to the Home page, Scheduling, Delivery, and Help. Drivers will often use our free mobile Driver App, rather than the full Control Panel, or at least more often than the full Control Panel. You can click here for a tutorial and training video on the Driver App.
Adding/Editing Groups and Restricting Access
Groups are available to be edited for custom access to various areas of the Control Panel. The following areas and sections can be restricted:
To edit User Groups, click "Edit" groups next to the dropdown box. Select the group to edit, or click "Add New" to create a new Group. You can make the following customizations (see the screenshot below the bulleted list to see the :
- You can nest a Group within another Group by using the "Parent Group" field. For example, you can create different classifications of Managers, such as a "Shift Manager" Group and a "Warehouse Manager" Group, both of them nested within the "Manager" Parent Group. The screenshots below use "Warehouse Manager" as an example.
- You can "Disallow" full navigation tabs such as "Reports" or "Scheduling," as well as individual dropdown menus within the "Admin" area, such as "Rules" or "Website," and even individual areas within the "Admin" dropdowns, such as "Users" or "Misc Settings". See the screenshots below for an example.
- Permissions: you can establish a "Level" between 1-10 for the Group. See this article for a full breakdown of what Permission Levels govern. If you're creating a Group to be a "Child" Group within another "Parent" Group, it's generally a good idea to not establish a higher "Level" for the child Group than its Parent Group. By default, "Admin" is Level 10, "Manager" is Level 8, "Employee" is Level 4, and "Driver" is Level 1.
See the screenshots below for reference.
Comments
0 comments
Please sign in to leave a comment.